

Gary Hinze
From Discourse 9
All photos by Gary Hinze
INTRODUCTION
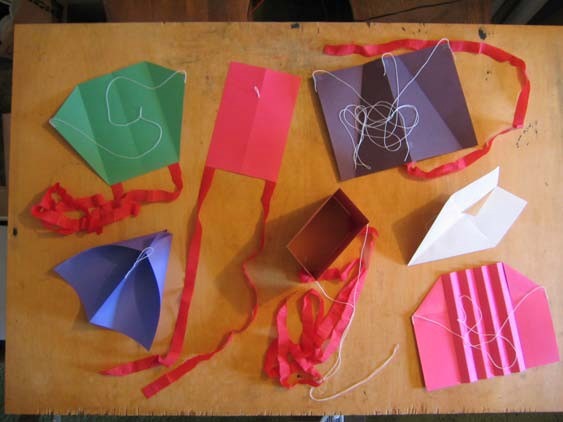
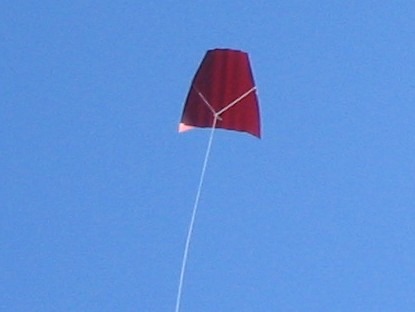
Here are some kites that are quick and easy to build and fly, made from readily available, inexpensive materials. No sticks are used. They are stiffened by creases in the paper. These kites are good for classrooms, homeschoolers, scouts, senior crafts, church groups, or parties. I picked these three to show you from 42 kites that I made for this project.
MATERIALS AND TOOLS
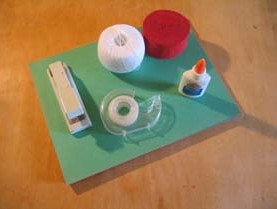
The materials you need are 9” x 12” construction paper, thin cotton string, a 2” roll of crepe paper, glue, and tape. Substitutions may be made. For example, heavy grocery bag paper will do for the construction paper. Strips of newspaper, cut along the grain and softened by crumpling, will work for the crepe paper.
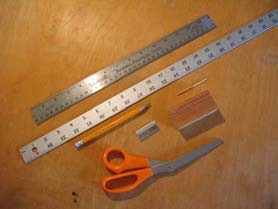
Tools required include a steel straightedge for marking and guiding cuts, a yardstick for measuring bridle string and tails, a pencil for marking positions and lines, a round toothpick for poking holes in paper, a razor blade for cutting paper, a block for pressing folds, and scissors for cutting string and paper. Again, substitutions may be made. A razor blade may be inadvisable for small children, and cuts may be made beforehand by adults or scissors may be used. I used a sailmakers needle instead of the toothpick. You will also need a suitable workplace. If you plan to cut paper with a razor blade, you will want a work board that may be scratched. The side of a cardboard box will do. Newspapers will keep glue off tabletops.
MAKING TAILS:

1. Many kites require tails. It is good to make them up in bulk and have a box of them handy. For this set of kites, you will need at least two tails.

2. Start by laying out several laps of tail material. The tails are cut to 1/2 the width of the roll and in 3’ lengths. If you are making them from newspaper, you may cut out 1” strips along the paper grain, crumple them to make them flexible, and glue together to get the length needed.
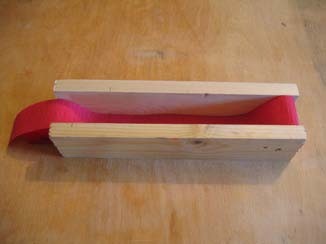
3. Align the edges by pressing between blocks of wood, yardsticks, or cardboard.
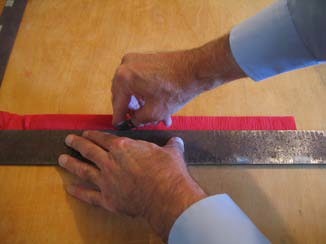
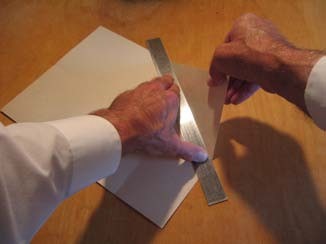
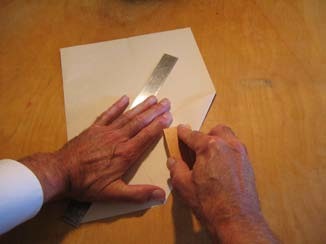
4 . Measure the width, which will not be exactly 2”, center the steel straightedge on top of the stack, hold it securely, and, with a sharp new razor, cut the pack in half. You can also cut smaller bundles with scissors. Cut the 2” strips into 3’ lengths, fold them in half three times, tap on the table to align the edges, and cut the bundle in half along the 4 1/2” length.
SLED KITES:
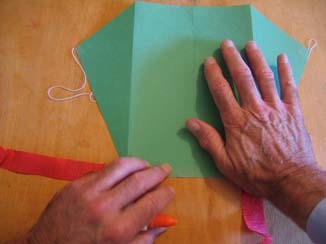
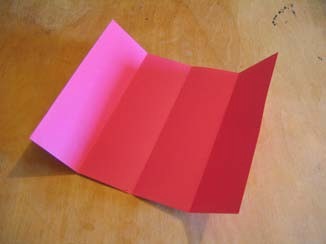
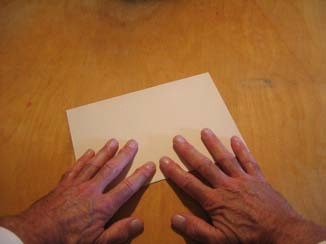
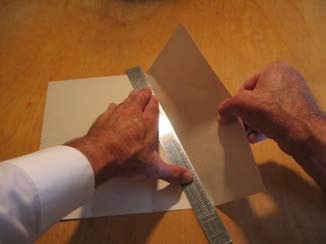
1. Let’s start with a simple kite that illustrates some basic construction methods and represents a whole family of kites that may be made in the same way. Put the corners together, align the 9” edges and fold the 9” x 12” paper in half.
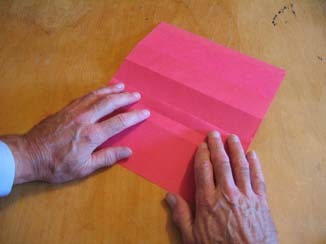
2. Make a sharp fold by flattening it with the wood block.
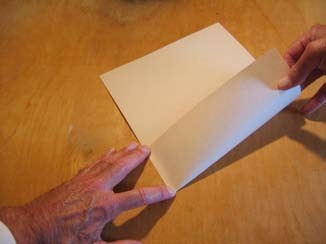
3. Align one edge with the center fold and fold that half in half. Do the same on the other side to divide the sheet into four equal panels.
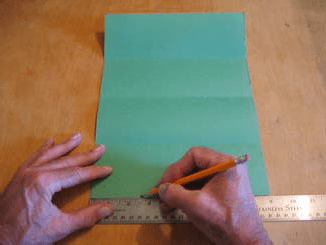
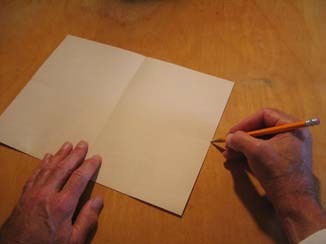
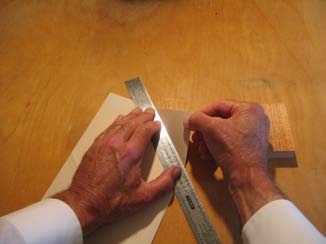
4. Mark points on each 9” side 2 1/2” back from one of the 12” edges.
5. Draw a line from the marked point to the front end of the nearest fold line.
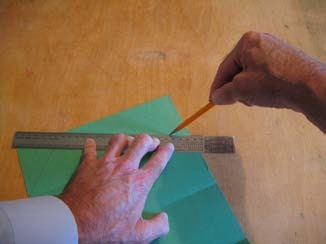
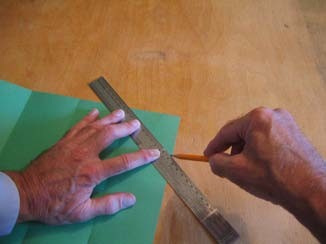
6. Draw a line from the marked point to the aft end of the nearest fold. Do the same on both sides.
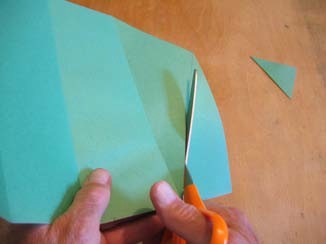
7. Cut the four triangles off of the corners with scissors.
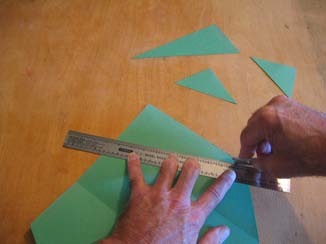
8. Builders who can safely use razor blades may cut the corners off without making pencil lines.
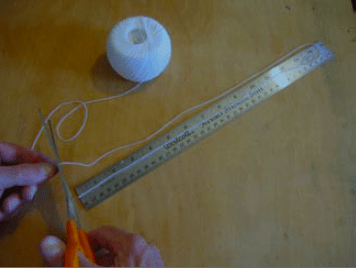
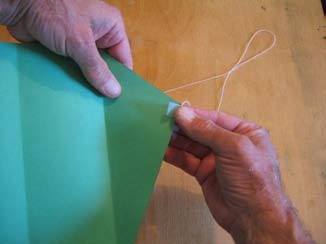
9. Double the string to make a 15” loop and cut it off.
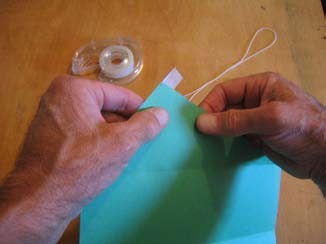
10. Apply tape to the corner of the paper.
11. Press the end of the string onto the tape along the edge of the paper.
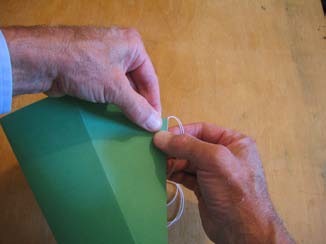
12. Fold the tape over the string.

13. Press the tape down to make sure it sticks tightly to the paper and string. Attach the other end of the string to the opposite side in the same way.
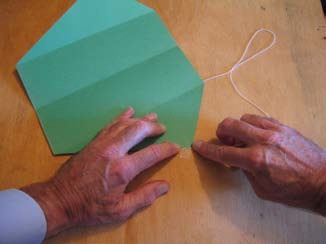
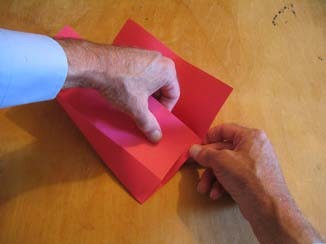
14. Carefully align the corners.

15. Draw the string out evenly from both sides.
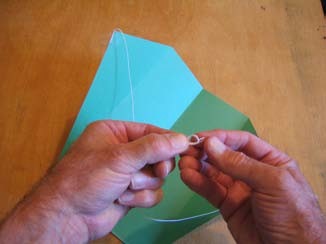
16. Tie a knot in the doubled string to form the bridle loop.
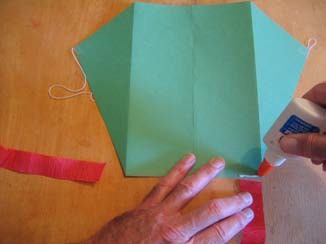
17. Apply glue to the back corner the width of the tail.
18. Press the tail into the glue to attach it to the kite.
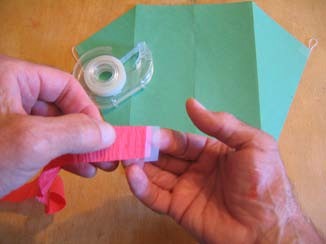
19. Or apply tape to the end of a tail.

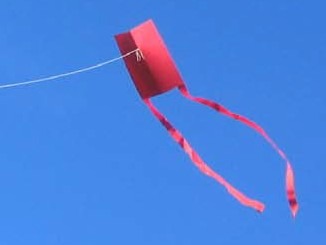
20. Press the tape to the back corner of the kite to attach the tail. However you do it, there will be two tails on the back corners.
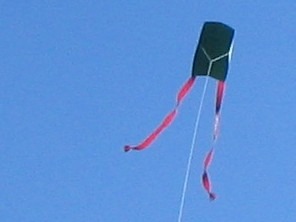
21. The kite is ready to fly! Tie the end of the flying line to the bridle loop.
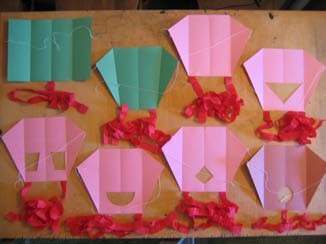
22. Here are several variations on the sled kite concept. These can be made in the same way. The one with the tapered side folds is 7” wide at the top edge and 5” wide at the bottom edge.
FAN KITE:
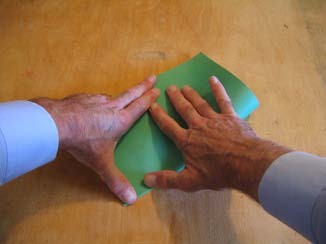
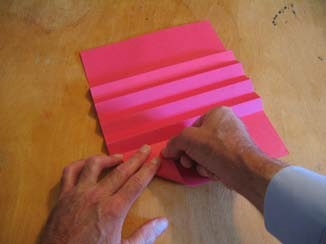
1. My first fan kite was made from a paper towel about 40 years ago. Fold the sheet into quarters, as with the sled kite.
2. Bring one edge to the fold on the opposite side, align the edge with the fold, and crease the paper. Do the same on both sides.
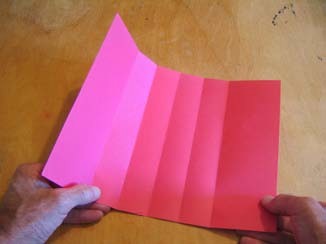
3. There will be five folds dividing the center into four equal panels.
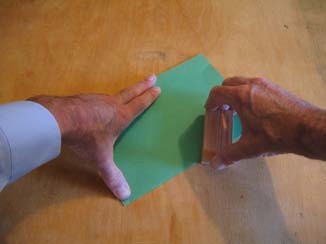
4. Turn the paper over, bring the edges of each center panel together, and crease the paper.

5. This makes a fan of 8 panels.
6. Fold the corners over, bringing the front edge against the fold.
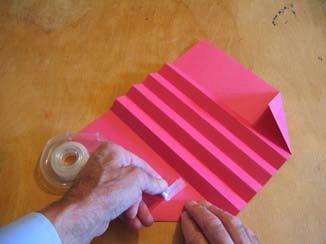
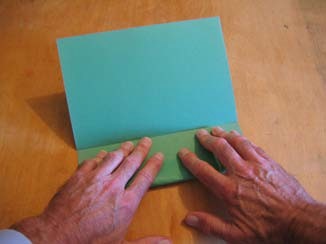
7. Tape the triangles down.
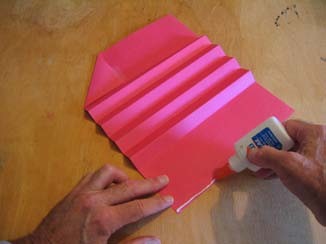
8. Or glue the edges down. Put glue on both edges opposite the fold.
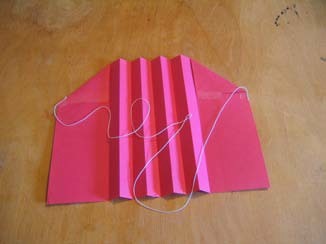
9. Measure and cut an 18” loop of string, tape the ends to the corners, align the corners, pull the string out evenly, and tie a small loop in the center, completing the kite. This kite does not need tails.
10. Take the kite out and fly it. It flies in a wide range of wind speeds.
PAPER AIRPLANE KITE:
1. My serious interest in kites began years ago when I tried flying paper airplanes as kites. This new design was made just for this project. It is derived from an origami glider, but uses a rectangular sheet of paper. Start by folding the 9” x 12” sheet in half parallel with the short sides.
2. On one of the 12” sides, bring the corner in to the center fold and make a crease to mark a point halfway between the center and the corner. Do the same on the opposite side. This 12” edge will become the trailing edge of the wing.

3. Make creases at the centers of each of the 9” sides.
4. You may want to make the creases more visible with pencil marks. (If you are not an origami purist, you can mark then with a ruler.)
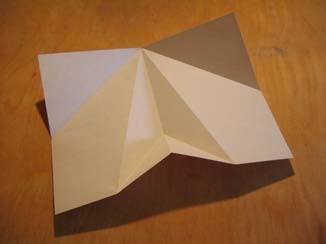
5. Place a straightedge between the center point of the unmarked 12” edge and the center point of a 9” edge. Pull up a corner to make a crease. Do the same to the opposite side. These fold lines will become the wing leading edges.
6. Sharpen the creases by rubbing them with a block of wood, but do not press hard enough to curl the paper.
7. Put the straightedge from the center crease on the leading edge to the quarter point mark on the trailing edge and pull up the paper to make the wing root crease. Once the paper is creased, fold it back along the same line the other way. Do the same on the other side.

8. Mark points on the centerline 5” and 6” from the nose.
9. Fold the paper in half, place the straightedge between the 6” mark on the centerline and the back end of the wing root fold and pull the corner up, forming the fin fold crease. Fold the fin crease back and forth.
10. The fin will be folded up inside the sides of the fuselage.
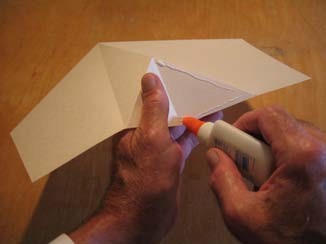
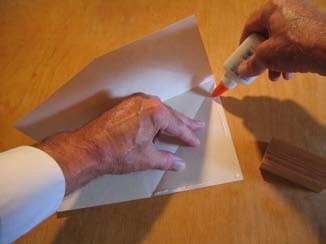
11. Apply glue to the two edges of the fin triangle opposite the center fold.
12. Apply glue to one side of the fuselage where the wing roots will come together and to the other side beside the fin.
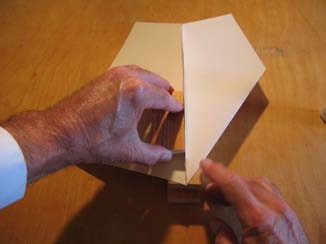
13. Bring the fin and fuselage sides together and press. Let the glue set.
14. This shows the completed fuselage and fin gluing.
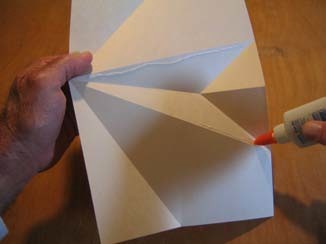
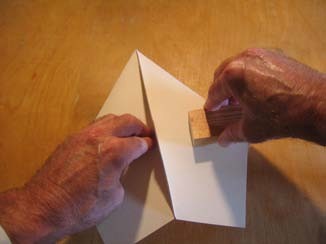
15. Apply glue to the edges of the wing leading edge panels opposite the crease, then fold it over.
16. Put the wing up on blocks of wood to prevent the fin being bent and press the paper along the glue joints. The panel overlaps the centerline, so press on the other side of the center line as well.
17. Do the same for the opposite wing. Let the glue dry.
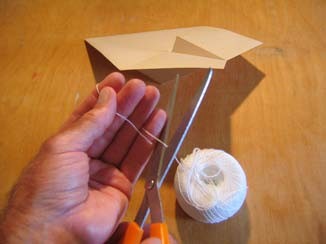
18. Cut a short loop of string.
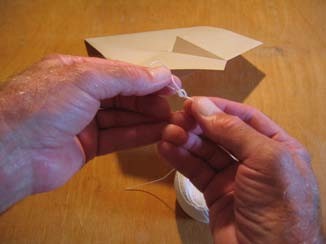
19. Tie a knot in the middle to form a bridle loop.
20. Tape the bridle loop to the kite with the knot at the 5″ mark.
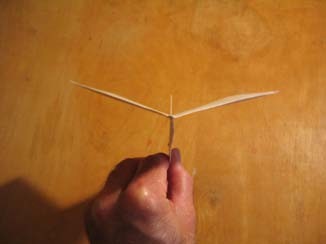
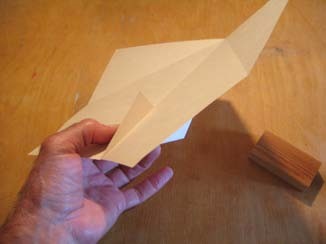
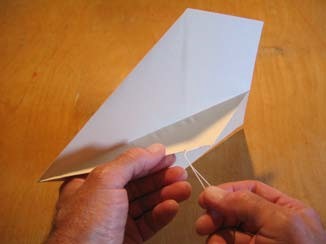
21. Bend the wings up to form a dihedral angle.
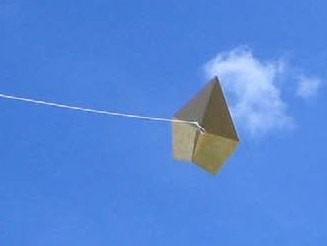
22. Take it out and fly it. Now your paper airplanes can stay up longer than you can throw them!
THE FLYING LINE
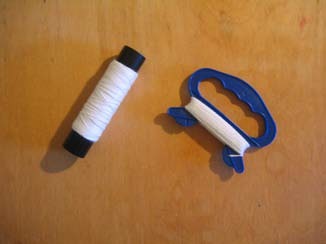
1. These kites are small and will not pull up much line against the wind. About 100 feet of line will be enough to get your kite over the trees and into the steady wind. Those small spools make it difficult to manage your line. You need something bigger.
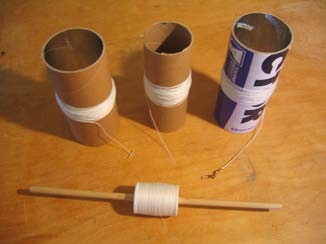
2. Spools may be cut from cardboard mailing tube, tennis ball tube, or badminton shuttlecock tube. A 4” nut can is good, but be sure there is no sharp metal in the end. These kites will fly on thread. You can force a length of dowel into a spool of thread.

3. Paper may be wrapped around the dowel to get a tight fit. Nylon mono-filament thread works well, but is difficult to make secure knots. I recommend using a fisherman’s snap swivel, shown on the rightmost spool, and following the instructions for making the fisherman’s knot. The leftmost spool has a toggle attachment. The toggle is a 1/2” length of round toothpick or bamboo skewer. The toggle may be used to secure your string to the spool. Poke a hole in the middle of the cardboard spool with a nail and push the toggle through the hole.
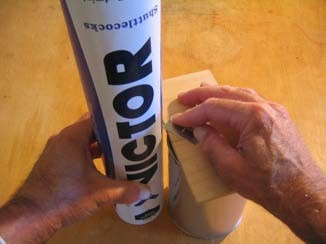
4. Cardboard tube may be cut to length by supporting a razor blade on a piece of plywood on top of a nut can and rotating the tube against the point while holding the end square to the tabletop. This must be done slowly to get an accurate cut and takes a long time. A table saw is much quicker.
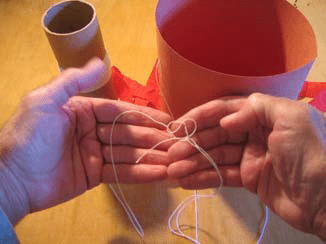
5. The simplest way to attach the flying line to the bridle loop is a slipknot. Be sure to tie it so the end pulls the knot out, not the flying line.
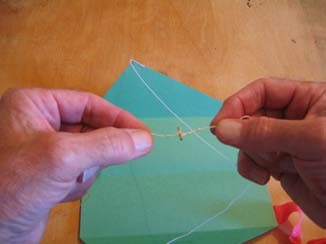
6. This shows how the toggle is used to attach the string to the bridle loop. The loop should be shorter than the toggle, just large enough to push the toggle through endwise. The toggle is rotated square to the string and pulled back to the loop.
WIND
Most of these kites will fly at a fast walking speed. A good way to find out the speed range of a kite is to take it out in a big field when there is no wind and walk, jog, and run.