

By Lee Toy
Vol. 7 No. 4- Jul. -Aug. 1984
AND THE WINNER IS
The 12th Annual Father’s Day Kite Festival was a great success in spite of the high winds and smaller turn out than usual for this year¬ly event. A big THANK YOU goes to Mike Mcfad¬den of Kitemakers of San Francisco Pier 39 and Lance Lew of KLOK Radio (103.7 FM)for putting together this festival to benefit Big Brothers and Big Sisters of San Francisco. The esti¬mated attendance was 3-4 thousand and almost 1000 dollars were donated to the cause.
First Place Trophies were awarded to the following:
Largest Kite: George Ham, S.F., CA for his 82 sq. ft. parafoil.
Smallest Kite: Emily Greenburg, somewhere U.S.A. for a tiny box kite.
Most Unusual Kite: Raymond Minnie, Napa, CA for his train of three Rotor kites, they flew great.
Stunt Flying: Brock Parsons, S.F., CA flying a 6 pack of Rainbows.
San Francisco Theme Kite: Neil Thorburn, San Jose, CA who flew the Golden Gate Bridge on an extended sled/flare kite. $100 gift cert. Parent/Child : ???
KLOK Radio Kite: Leland Toy for his flying Grandfather’s Clock. It was a tie between a 4 line stunt kite of Neil’s and the flying clock. The audience helped to decide the winning kite by cheering for their favorite. The prize for the KLOK Kite was a trip to Maui which is yet to be collected but is arranged for late November.
The SNAFU this year was that the SF Fair was being held at Fort Mason on the same weekend. Parking at the Marina Green and for blocks surrounding the Green were all filled by 10am. Next year’s Fair location will be taken into consideration.
CALIFORNIA HERE WE COME
BAKE welcomes Bob McCort and family, who are moving to Northern California as soon as they can find a house. Actually Bob is here living in some hotel out of his suit cases.
Bob is an enthusiast from Seattle and brings years of experience as a WKA member, past president, workshop leader and AKA board member. Bob has made it down to the Green on several occasions flying his kites and trying to recruit new members for the kite frats.
MARINA GREEN
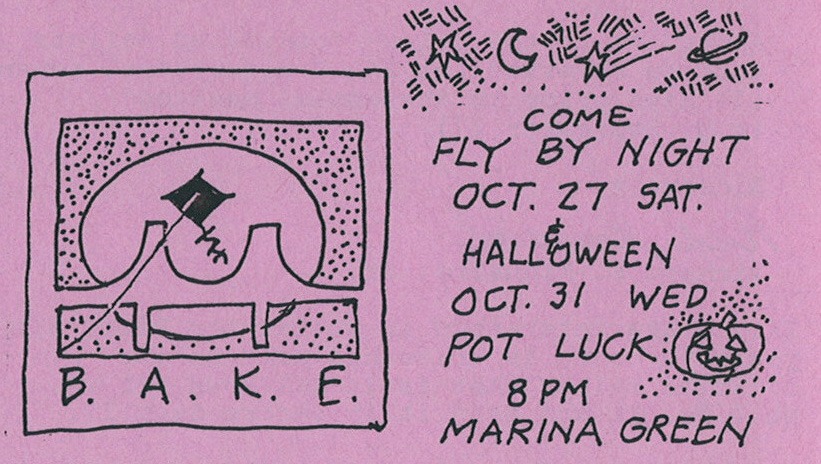
NIGHT KITE FRIGHTS FOR HALLOWEEN
Halloween in San Francisco is somewhat like Mardi Gras in New Orleans – it’s celebrated as a national holiday. Festivities go on for several days and nights. Although we don’t have parades like New Orleans we certainly have incrediable sights. We’ll be adding our two cents to the spectacle when we will be flying kites at the GREEN on Saturday Oct.27 as well as on Halloween night Wednesday Oct. 31.
Costumes are encouraged as well as bringing a pot luck dish to add to our tailgate buffet. See you there.
TENNESSEE KITE WALTZ
It’s not too late to attend the kiting event of the year. AKA’s 7th Annual Convention will take place Oct. 4-6 in Nashville, Tenn.
J. Winqhead Harris, WINDANCE SOCIETY president guarantees a good time for all who attend.
The theme this year is a kite symphony which is sure to spark the imaginations of those kite flyers with an ear for WINGED instruments. For those of us unable to attend video tapes and soundtracks will be available. For more information write: June Dorman, 216 Leonard Ave. Nashville, TN 37205 Registration is $90.
AKA ELECTIONS
For those of you who are interested and happen to be members of AKA, this is an election month. KITE FLYER was notified of a write-in candidate for the office of president.
Dear Friends:
I have decide to run for the presidency of the American Kitefliers Association. I am asking for your support and your vote.
As president, I will:
- broaden the national participation in policy making;
- cultivate our international image;
- establish continuity for the convention and associated events;
- increase communications internally; and
- strengthen our educational activities.
According to the bylaws “completed ballots must be received (at AKA Headquarters) seven (7) days pripr to the annual meeting”
(e.g. September 27)
Sincerely,
Richard F. Kinnaird, Jr.
If you are interested in voting for Rick, all you have to do is write his name on the official ballot that is in AKA News Vol VI, No.4 Pg. 16,and send it in before Sept.27.
Incumbent president is Miller Makey, Sr. from Columbus,Ohio. Miller is the founder and past president of the Central Ohio Kitefliers Association. He and his wife Betty have been active in conducting workshops for children as well as adults.
Retired form social work, Miller and betty have spent much of the last year in kite-related travel, including the Weifang Kite Conference. A member of AKA since 1979, Miller has attended the past five AKA Conventions and is a member of seven kite groups around the country.
Best of luck to the winner!!!
FLYING BY NIGHT____________________________
BAKE’s first night flight was a beauty. About 20 flyers arrived on the Green before
night fall with a variety of devices to light up the night. Marty Doweling’s new van became the wind break for the kitchen area set up on George and Marion’s card table which soon overflowed with gastromonic delights brought by various kite chefs extrodinare.
We were fortunate to experience one of those elusive “warm San Francisco nights” with a light 5-8mph breeze and NO FOG!!! If you think that kites attract attention during the day, you should attatch some lights and see what comes out of the woodwork to enjoy the lighted sights at night.
In order to capture some of the activities of these insomniacs, Marty brought out his camera and flash. Spontaneity is also father to invention when he attached a “slave” flash unit to the bridle of one of George’s parafoils and then took a series of pictures with George in the foreground lit up by the main flash ami his kite is lit up by the auxiliary Slave flash which is some 30 to 40 feet up in the air. Did it work? We’ll let you know as soon as the film gets developed.
One of the most popular ways of lighting up night kites are the use of chemical glow sticks known as Cyalume lights. These sticks are light weight plastic tubes that are filled with two different chemicals that are separated by a thin glass vial. When the tube is bent, the vial breaks and the two chemicals are mixed by shaking the tube. Once the tube has been activated the light will last for about 8 hours. Typically the light is an eerie green color, although red and blue lights are also available. The red light is caused by coloring the plastic tube. I don’t know if the same technique is used for the blue light or if the chemicals are different to produce the colored light.
Usually people will string a bunch on the fly line or on the kite itself. For the more adventurous you can try a trick the Suzanne Conrad cooked up in Seattle; she breaks open the night stick and smears the glowing fluid all over the kite cover. It’s quite a sight as well as a mess, the chemicals seem to stain a bright green. The Cyalume lights can be found in camping supply stores as well as some large drug stores. Several kite shops are stocking them as well. It is best to keep the sticks “in the dark” so if you get some sticks that are not, packaged, wrap them in aluminum foil until you are ready to use them. They retail at about $2.00 a piece.
Besides Cyalume lights we had flash lights, small fluorescent lights, and even a regulation sized yellow construction blinker flying thru the air. But if an award for the”Most Outrageous Display° were to be given it would have to go to Brock Parsons for his lighted Rainbow Stunt Kites.
First you have to understand that Brock is Rainbow crazy, I don’t even think he knows about single line kites. When he thought of flying his kites at the Green at night, Brock put on his thinking cap and brought out his VISA card. Brock’s Rainbows were transformed into one of the most ambitious night flying objects I’ve seen.
Lynn Farin, a writer whose work appears in Motorland (AAA’s magazine), compared our endeavors to that of observing mysterious deep sea creatures living in the bottom of the ocean where the only lights are those generated by the indigenous life forms. Who knows perhaps BAKE’s night flight may end up as an article for things to do in SF at night.
In order to capture some of the activities of these insomniacs, Marty brought out his camera and flash. Spontaneity is also father to invention when he attached a “slave” flash unit to the bridle of one of George’s parafoils and then took a series of pictures with George in the foreground lit up by the main flash ami his kite is lit up by the auxiliary Slave flash which is some 30 to 40 feet up in the air. Did it work? We’ll let you know as soon as the film gets developed.
One of the most popular ways of lighting up night kites are the use of chemical glow sticks known as Cyalume lights. These sticks are light weight plastic tubes that are filled with two different chemicals that are separated by a thin glass vial. When the tube is bent, the vial breaks and the two chemicals are mixed by shaking the tube. Once the tube has been activated the light will last for about 8 hours. Typically the light is an eerie green color, although red and blue lights are also available. The red light is caused by coloring the plastic tube. I don’t know if the same technique is used for the blue light or if the chemicals are different to produce the colored light.
Usually people will string a bunch on the fly line or on the kite itself. For the more adventurous you can try a trick the Suzanne Conrad cooked up in Seattle; she breaks open the night stick and smears the glowing fluid all over the kite cover. It’s quite a sight as well as a mess, the chemicals seem to stain a bright green. The Cyalume lights can be found in camping supply stores as well as some large drug stores. Several kite shops are stocking them as well. It is best to keep the sticks “in the dark” so if you get some sticks that are not, packaged, wrap them in aluminum foil until you are ready to use them. They retail at about $2.00 a piece.
Besides Cyalume lights we had flash lights, small fluorescent lights, and even a regulation sized yellow construction blinker flying thru the air. But if an award for the”Most Outrageous Display° were to be given it would have to go to Brock Parsons for his lighted Rainbow Stunt Kites.
First you have to understand that Brock is Rainbow crazy, I don’t even think he knows about single line kites. When he thought of flying his kites at the Green at night, Brock put on his thinking cap and brought out his VISA card. Brock’s Rainbows were transformed into one of the most ambitious night flying objects I’ve seen.
To start with he bought several dozen model train lights. He then got some glass dye to match each color of his set of kites (six?) and outlined each kite cover and a few added along the vertical spine. The juice for the lights was supplied by battery at the flyer’s location and the wires were strung along one
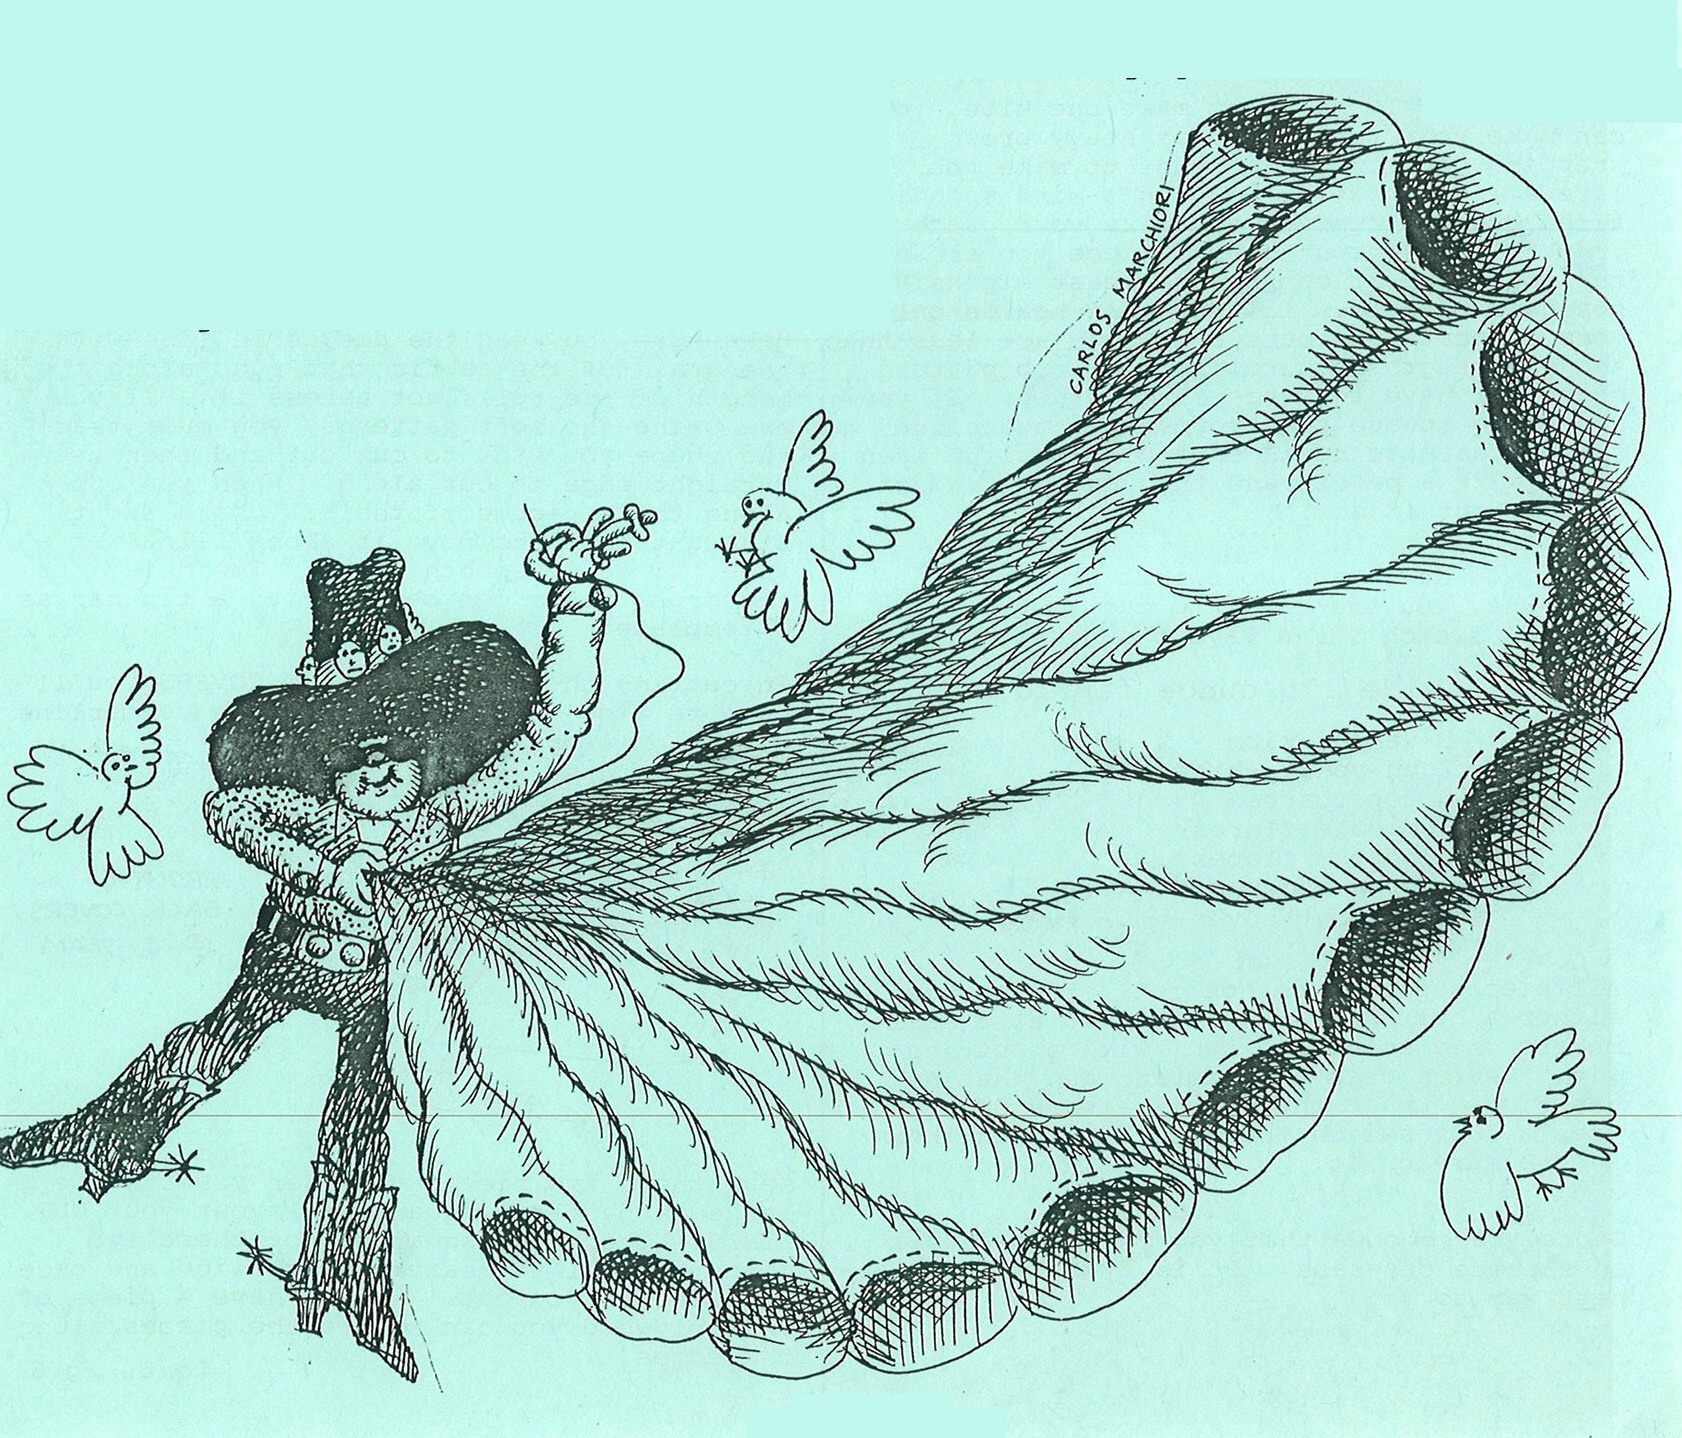
THE WORLD OF PARAFOILS ACCORDING TO THE MAYOR OF THE GREEN – GEORGE HAM
There is more than one way to skin a cat but George’s method is one of the best if you happen to like cats that can fly.
The kite design that will follow in the next few issues of KITE FLYER has been developed by George over the past seven or eight years he has been making, designing and flying this most radical kite design of recent times. Parafoils are not for everybody, although if you are careful and work slowly they are a kite anyone can build given some sewing skills and lots of patience. A well made parafoil is a labor of love that is well rewarded by its excellent flying characteristics.
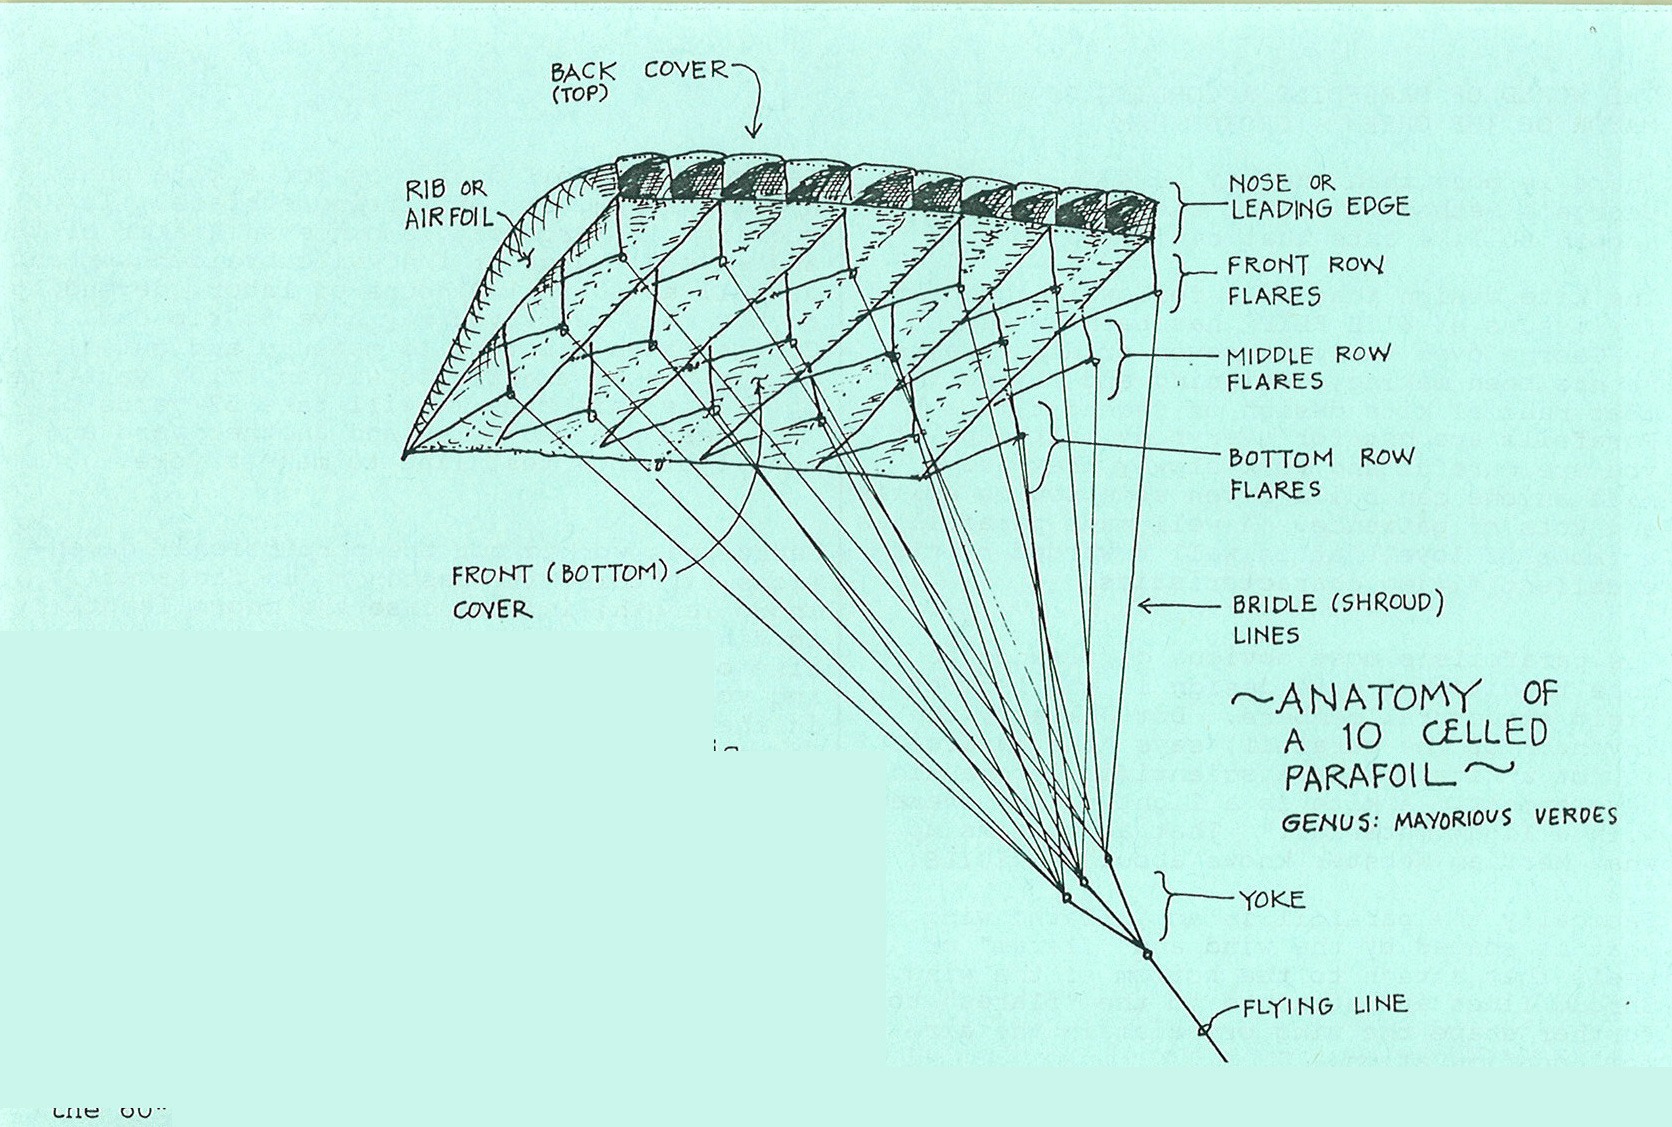
The parafoils’s most obvious difference to more traditional kite design is the lack of rigid structural members. Dom Jalbert, the inventor of the parafoil, says “the parafoil is not a kite, it is a scientific aeronautical development. A kite is a light frame covered with a light material.” That about sums up what Merriam-Webster knows about PARAFOILS.
Basically the parafoil is an inflated wing that is shaped by the wind and “flares” or keels that attach to the bottom of the wing. Shroud lines are attached to the “flares” to further shape the wing or maintain the airfoil configuration. —
George’s parafoil design is for a kite that has 26.736 sq. ft. of lifting surface. It requires 12 yards of .75 ounce spinnaker cloth and several yards of 1/4″ wide braided webbing as well as 40 to 100 hours of labor, depending on how many seams you may have to rip out. George takes his time to measure and cut all
of his pieces exactly to within 1/16″ variance. To bridle this kite it will take 52 yards of 100# test braided nylon and another yard and a half of 150# test line to make a yoke.
George has worked out the porportional dimensions for this kite based on the finished chord length, in this case the chord length is finished to 55″. If you wish to vary the size of this kite you may do so by multiplying your desired chord length by the % given in the dimensions of the various parts. George has successfully scaled this model up to 82 sq. ft. George recommends that if you do wish to design your own kite, that you do it on graph paper first using the basic angles and percentages given in this design.
If you are only going to make one kite, you can make your patterns from heavy brown wrapping paper. If you want to make your life a little easier and don’t mind spending a few green backs you can make your patterns from “illustration” board, since you are only cutting it up it can be the least expensive boards available. Illustration boards only come in certain dimensions which are less than the 60″ length required for the rib pattern
so you’ll have to piece it together. If you are going to use the brown paper technique, all you have to do is carefully outline each piece with a pencil and then use a straight edge to cut it out.
After you have made your soft or hard patterns, you are ready to cut your fabric. See the sketch for a layout suggestion. pg.5
From 41″ wide .75 ounce fabric cut:
9 vented ribs
2 un-vented ribs 6 top flares
6 middle flares 6 bottom flares one back cover – Two pieces
one front cover-Two Pieces
All pieces should be hot cut. You can use either a hot knife, such is used at a sail-makers or a soldering gun with a cutting tip. George uses a soldering gun that he has rigged up so that it is always ON. He uses a foot switch that operates when there is pressure on it.
George recommends that you cut your fabric on a piece of glass. It is by far the clean-nest way to go.
Make sure you keep the pieces in line with the grain of the fabric that runs along the length of the roll, not across it. If you are using the soft patterns, you must trace the shape you want to cut out and then use a straight edge to cut along. When you cut along the top edge of the RIB use a short straight edge and move it along 1-1/2″ at a time, to get a smooth curve. The holes for the cross vents can be cut with a tin can as a template.
In cutting the FRONT and BACK COVERS you’ll have to piece two halfs along the centerline of the covers, see the plan.
Once you have sewn these two pieces together you can use a large carpenter’s square to layout your CUT LINES. Check the squarness of these two parts carefully, measure them twice and once more before you cut. If you have a piece of 1/2″ plywood you can square the pieces along the edges.
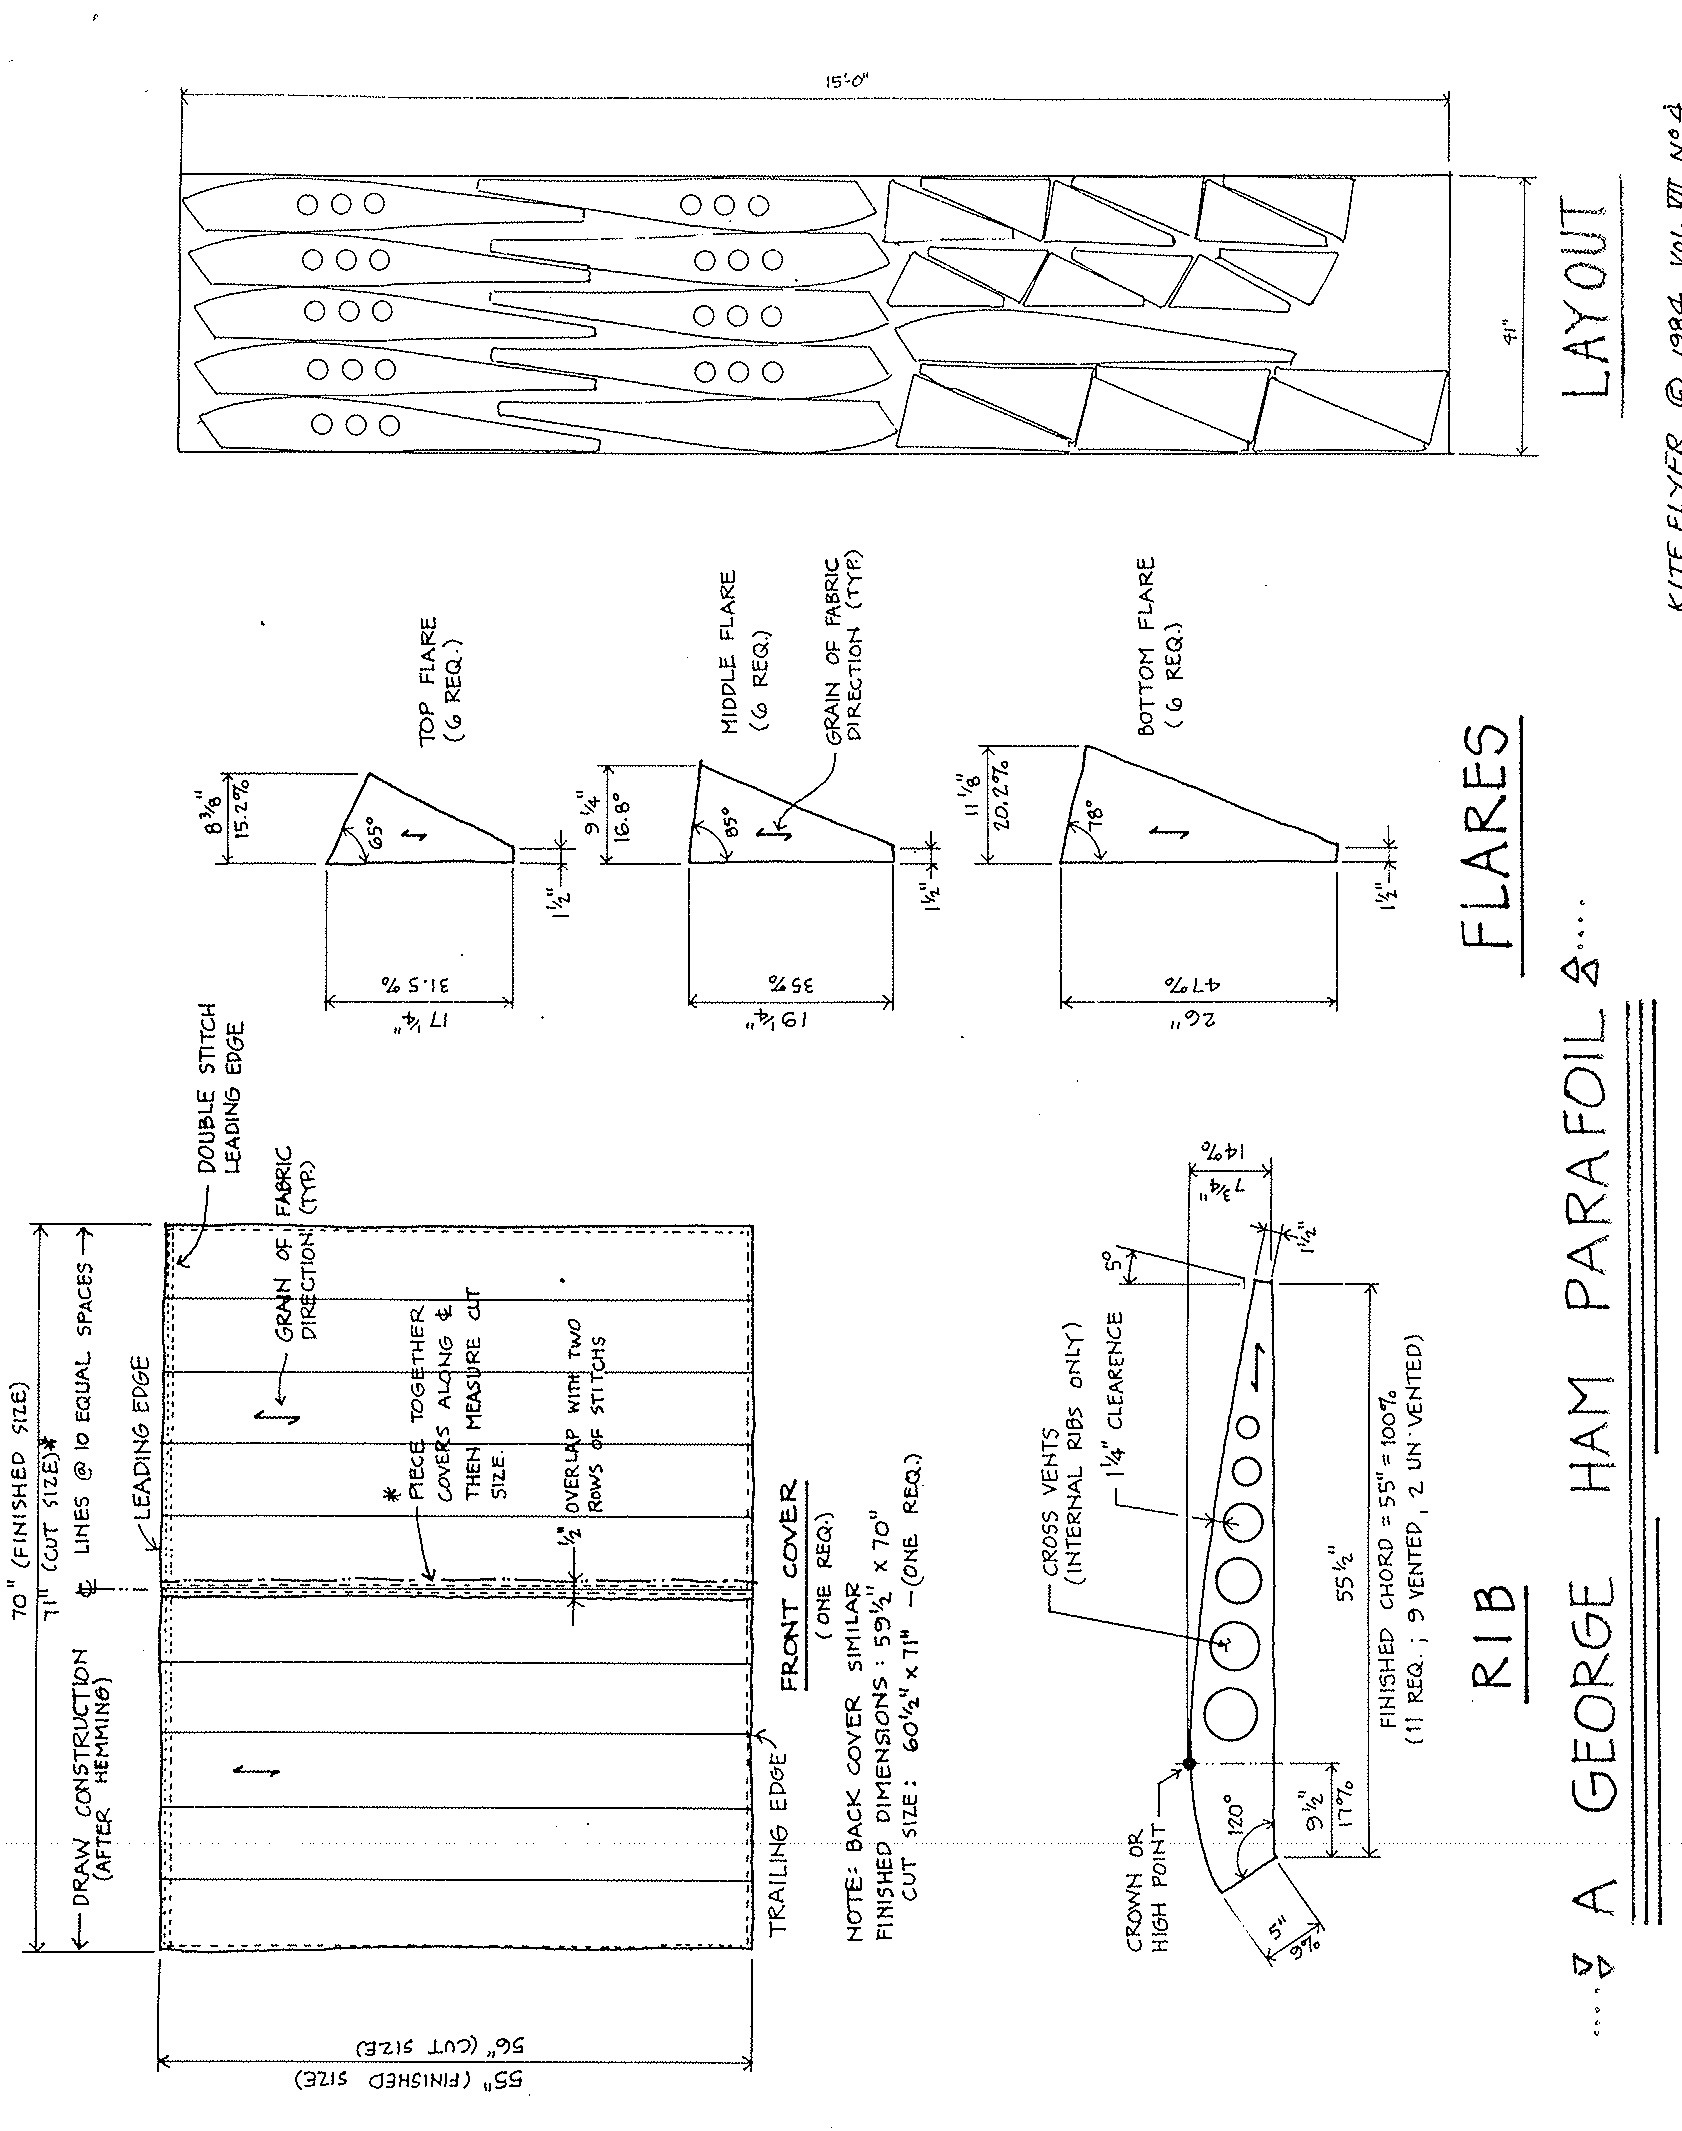
Once you have cut out all of your pieces, count and stack them neatly, you don’t want to get half way thru to find out you’re missing one piece. Now comes the fun part, draw a 1/2″ hem line around each piece as indicated below. A neat trick that Harold Writer uses in Seattle is to cut up some old wooden venetian blind to various hem widths necessary. In our case a nice 1/2″ x 2′ piece would do nicely. These hem lines are necessary for the accuracy of the kite, USE THEM. Note: no hems required on the trailing edges of the RIB or FLARE along the 1-1/2″ dimensions.

After you have drawn all of the hem lines, sit back and relax, take a breather for an hour or a day. Each step in making this kite the way that George makes them is necessary and cannot be rushed or shortened without compromising the end results. The next step is to HAND BASTE each piece.
You heard me right, hand basted, why do you think his kites fly so well? Actually it is a simple procedure. Fold the edge of the fabric to the hem line and then once again. The hem line should be at the outside edge of the finished piece. Hand basting is to use long loose stitches to hold the fabric in place before sewing. You’ll have trouble with pins, they are not accurate enough.
The basting stitchs are removed after the pieces are sewn together.
The easiest pieces to start with are the FRONT and BACK COVERS, since they are rather straight forward, practice on them. The side which the hem is rolled on to will become the “back side” of the piece as opposed to the “front side” or “the side that faces out”.

Next you can work on basting the RIBS. This is beginning to sound like something that Julia Child might like….NOTE: Of the 11 RIBS required, 6 will be basted on the “right” side and 5 will be basted on the “left”. Make sure that the two end RIBS, the ones without vent holes, are basted opposite one another, in other words one “right” and one “left”. Do not hem the trailing edge dimension of 1-1/2″ it should disappear when you hem the other two edges.
You can begin to sew the hems on your sewing machine. George uses *46 commercial polyester that is used in sail lofts. You may wish to use something not quite as exotic, but more accessible, SUISSE thread is good. The stitching lines should run down the center of the 1/4″ hem, EXCEPT at the leading edge of the COVERS and RIBS:
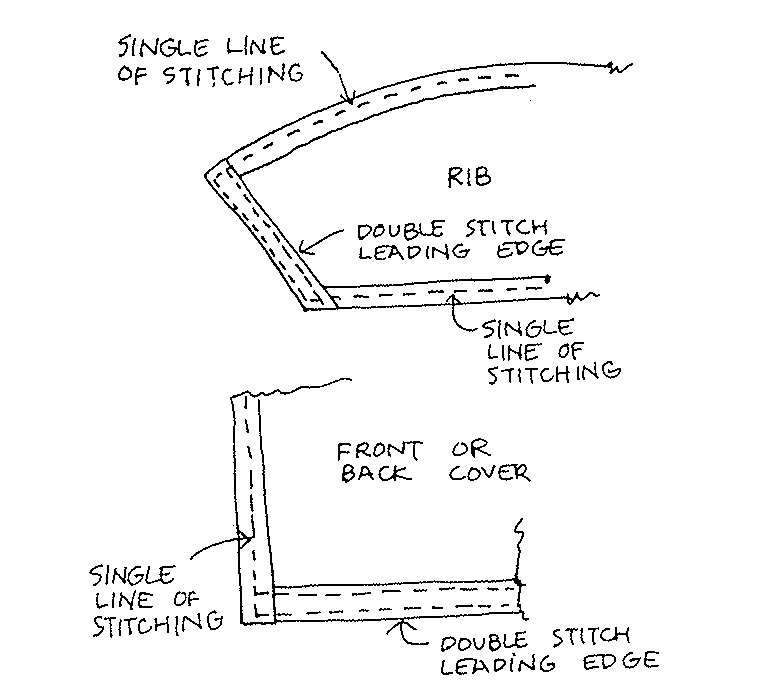
Next issue we will continue with the basting of the FLARES and adding the BRIDLE TABS as well as preliminary assembly of the RIBS to the covers. Until we read again…Bon appetit.
BY WAY OF STANDARD REFERENCE–KITE FLYER NEWS IS AVAILABLE SIX TIMES A YEAR (WEATHER PERMITTING) AT THE MINIMAL COST OF A TRIP TO DOGGIE DINER–FIVE BUCKS A YEAR. SEND ALL MONEY, TRADING STAMPS OR GOLD BARS TO: KITE FLYER, 1883 GRAND VIEW DRIVE, OAKLAND, CA 94618